Happy Friday! I first posted this card on Wednesday within the Pals’ Blog Hop for November. I thought I’d post it again, this time with some measurements and a few more details. It’s my Snowflake Splendor Fun Fold card and it’s easy to make!

Materials & Measurements:
- Pacific Point Cardstock, 8-1/4″x 4-1/4″ for base, and 3-1/2″x 2-3/4″ for front panel
- Seaside Spray Cardstock, 5-1/4″x 4″ for inside, and 2-5/8″ circle cut with Layering Circles Die
- Snowflake Splendor DSP, lighter print for left panel, 4″x 2-1/2″, and darker print for right panel, 3-1/4″x 2-1/2″
- Silver Foil Sheet, 2″ circle cut with Stitched Shapes circle Die
- Whisper White Cardstock, 2-1/2″x 2″ for blue trees, stamped with Pacific Point and Seaside Spray ink pads, In the Pines Stamp Set, and cut with Pine Woods Die
- Thick Whisper White Cardstock, 6″x 1-1/2″ to crop trees from Pine Woods Dies
Directions:
- Cut, score at 5-1/2″, and fold Pacific Point card base. Glue lighter print DSP to the left side panel.
- Position smaller Pacific Point panel so that it is centered top to bottom and about 1/4″ from the right side. Glue it on the left inch only as shown. Glue the darker print of DSP to the top of that panel.
- Stamp and crop blue trees. Glue to the lower left.
- Stamp greeting from Itty Bitty Christmas to Seaside Spray circle with Pacific Point ink and glue it to the Silver Foil stitched circle. Add the circle feature to the card with Dimensionals.
- Crop white trees from Pine Woods Dies. Add snips of Dimensionals to the back of one tree.
- Glue the other tree flat to the card along the right side. Leave about 1/2″ of the top of the tree unglued as it will hang over.
- Position the tree with Dimensionals over the circle and the flat tree. Stick into place.
- Add three Frosted & Clear Epoxy Drops (clear) to the front of the card.
- Brush the white trees with Wink of Stella.
Inside:
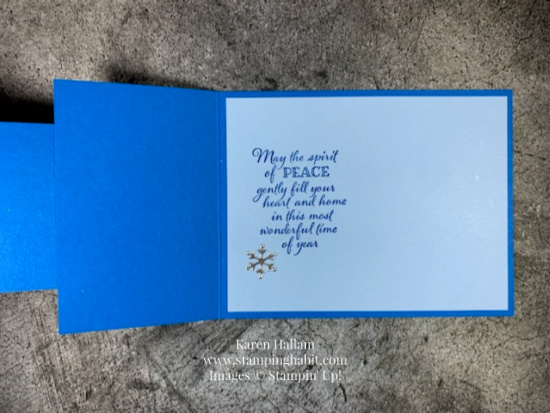
- Stamp your sentiment from Peaceful Boughs over on the left side of the Seaside Spray Cardstock piece with Pacific Point ink, then glue into place.
- Add a Silver Foil snowflake.


Thank you for asking for these measurements! I hope you enjoy making the card. Have a super weekend everyone!

November Host Code = GY3TDPN2
Product List
|
|
||
|
|
||
|
|
|
|
|
|


Beautiful card!!
Thanks, Shila!