It’s time for CASEing Coast to Coast with Rosanne Mulhern and me! Thanks for stopping by. This month we decided to create holiday fun folds for you. I went back and forth between Thanksgiving and Christmas, and landed on Christmas. The minute I saw this fun fold from Julie Davison, I knew I wanted to try it. I changed hers up a bit to suit my preferences, but the general idea came from her. Come take a look:
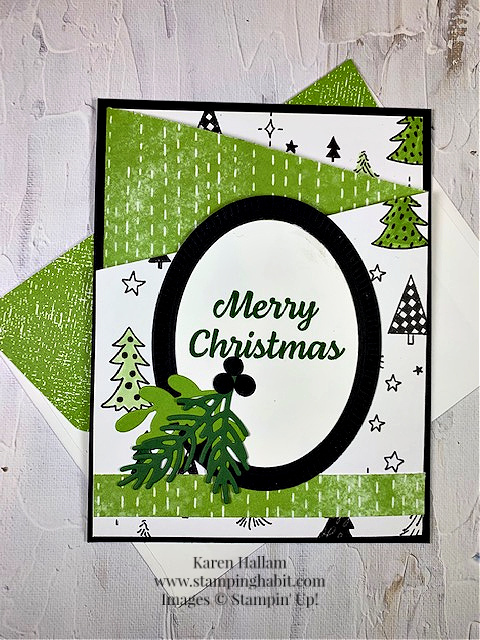
I’m not sure what to call it. I think I’ll call it an angled tri-panel card! Sound good? It is made mainly with DSP and you can get two cards out of one 12″x 12″ piece of DSP. I added a piece of cardstock to the back of mine to give it a little more stability, and I altered the length of the DSP to 5-1/4″ wide so it would layer nicely on that back piece of cardstock.
Opened up:
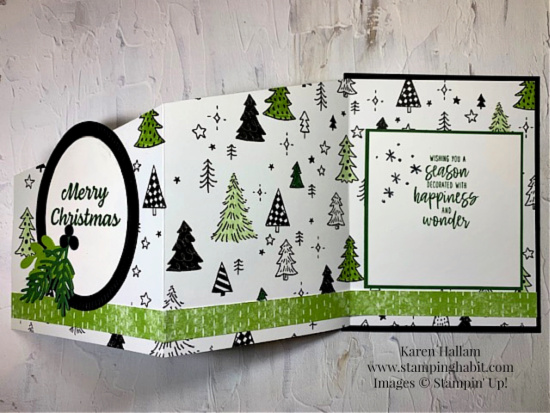
Materials & Measurements:
- Basic Black Cardstock, 5-1/2″x 4-1/4″
- Celebrate Everything DSP, 5-1/4″x 12″ for the main part of the card, and 1/2″ x 12″ for the strip that spans the length at the bottom
- Basic Black and Basic White for the oval and frame cut with Framed Florets Dies
- Garden Green and Granny Apple Green scraps for boughs, black scrap for berries
- Garden Green Cardstock, 3-3/8″x 3-3/8″ for inside sentiment mat
- Basic White Cardstock, 3-1/4″x 3-1/4″ for inside sentiment layer
- Garden Green and Memento Tuxedo Black ink pads
Marking and Cutting:
- First, glue the skinny strip of Granny Apple Green DSP along the bottom of the length of the black and white tree DSP (these two patterns are back-to-back DSP sheets). Leave about 1/4″ along the bottom.
- Next, put the DSP into your Stampin’ Trimmer with the 12″ sides top and bottom. Then lightly score at the 4″ and 8″ measurements.
- Now mark the 2″ spot on the right side and down from the top with a pencil. Take the scored DSP and put it in your trimmer so the 2″ mark is at the bottom of the trimmer and matching up to the cutting canal. You’re going to cut out a triangle shape from that 2″ mark to the 2nd score line. See diagram.
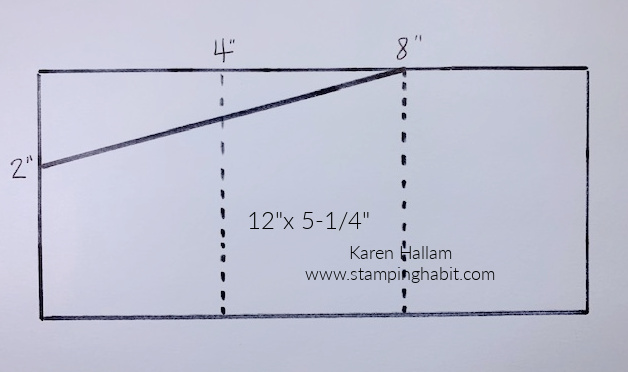
Folding and Decorating:
- Now, accordion fold the score lines (mountain fold for 4″ line and valley fold for 8″ line) and burnish with a Bone Folder. then glue the back panel to the Black Cardstock piece.
- Color the trees as desired. I used Stampin’ Markers (Blends would bleed through and show!) Use Garden Green, Granny Apple Green, and Soft Sea Foam and leave some of the trees black and white.
- Next, stamp your greeting onto the white oval. I used Garden Green ink and the greeting from Celebrate With Tags Stamp Set. Before gluing, open up the card, and glue the white oval and black frame to the front.
- Cut sprigs from green scraps and Christmas Banner Dies. The black berries were also cut from this Die Set.
- Last, stamp the 3-1/4″ white square and layer it on the green 3-2/8″ square. Glue this to the third panel, down low enough so you don’t see it peeking through the top when the card is closed.
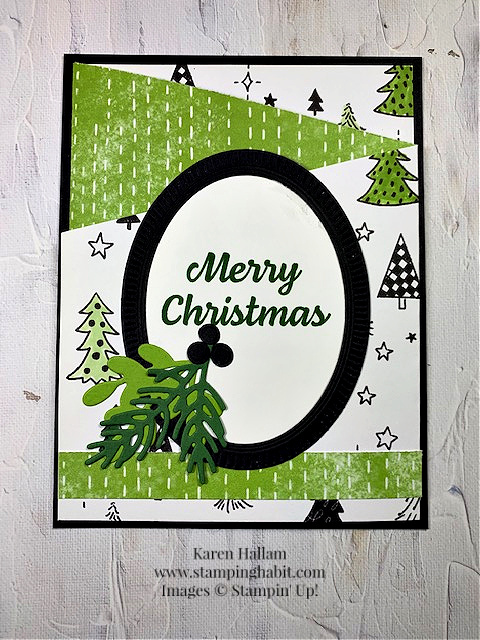
It’s rare when I don’t use any embellishments, but it seemed like there was enough going on with this card that it didn’t need any more!
Ready for another fun fold idea? Click over to Rosanne’s Heartfelt Stamping to see her beautiful card.
Thanks for joining us today! I hope you were inspired to try some new fun folds. See you tomorrow!

Product List
|
|
|
||
|
|
|




So fun. I have made these cards before and they are fun. I gotta look now for some holiday papers that work for this. Thanks for the inspiration!
Yes, lots of fun. And there are a lot more papers now that have coordinating fronts and backs than there used to be, so many will work!
Fabulous fun fold, Karen. I’m so inspired to create one and have been thinking of what products to use. This was a fun CC2C. As always, looking forward to next month!
Thanks, Rosanne, can’t wait to see what our next challenge will be!