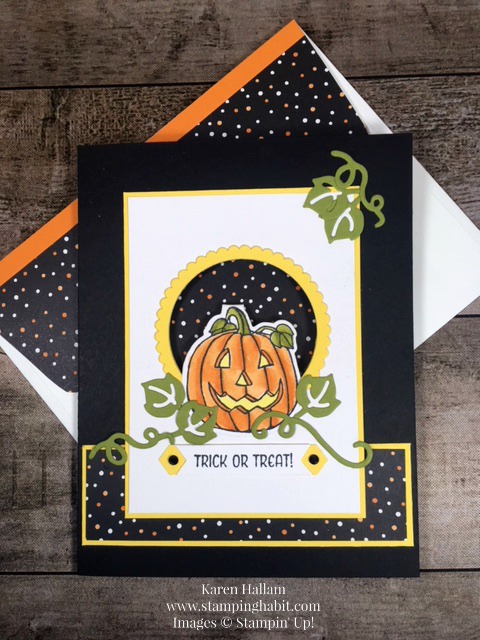
Halloween is this Wednesday, and I’m rushing to get a card made for my grandsons! So I made this cute peek-a-boo card using the Seasonal Chums stamp set and coordinating framelits ~

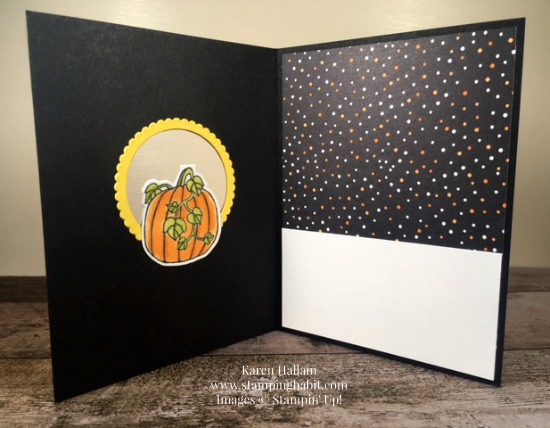
I think they are going to like the surprise of seeing the back of the Jack-O-Lantern when they open up the card!

This idea is from Dawn Griffith, and I made a few of my own decorating changes. And since the theme at the Festive Friday Challenge this week is Halloween/Black, it will make an appearance at #FF0019! See it HERE.
This is such an adorable set with stamps and framelits for Halloween and Christmas projects. Designed to make tags, it is fun to adapt to card-making. I’ve done both.

I have a confession to make: I have a lot of Halloween paper left over from years past, so I did not purchase any new paper this year! So, as you can see, I dipped into my old stash and found this DSP with all the colors I needed and layered it with Daffodil Delight and Whisper White on a Basic Black base.


I stamped the Jack-O-Lantern onto Whisper White, cut him out with the matching framelit, and colored him with my Blends, Pumpkin, Daffodil, and Olive. I snipped the little tab off, but left him in one long piece.
After layering the Daffodil and White layers together, I cut a hole using my Layering Circles Framelits. Then I lined it up where I wanted it on the Black base and traced around the circle. I took the base to the Big Shot and cut out the hole using the same circle framelit. Then I made two scalloped circle frames with Daffodil cardstock, using that same circle framelit and the next sized scalloped circle framelit. At that point I glued them around the hole on the outside and inside.
Once the layers were glued to the front, holes lined up, and all was in place, I folded my Jack and glued him into place at the bottom of the hole.

I added a White piece of cardstock to the inside right, over my DSP layer, just low enough that it won’t show through the hole in the front, but large enough to write my message to the boys.
With a few more decorations on the front, such as the Old Olive pumpkin leaves that come with the Seasonal Tags Framelits and some sparkle using Wink of Stella on Jack’s face, I am ready to send it out.

Cardstock cuts ~
Basic Black base: 5-1/2 x 4-1/4
Daffodil Delight layer: 3 x 4-1/8
Whisper White layer: 2-7/8 z 4
Strip across bottom Daffodil Delight: 1-1/4 x 4-1/8, DSP: 1-1/8 x 4
Inside: DSP 5-1/4 x 4, Whisper White 2 x 4
Happy Halloween to All! Enjoy the fun!

Product List
|
|
|
||
|
|
|


Your card is simply wonderful!
Adorable peekaboo card Karen! Your grandsons will love it! Thanks for joining us at Festive Friday 🙂
Really cute card!
Thanks, Jan!
I love this card, Karen. I like the Peek-a-boo design for sure, but what really attracts me is the sleek play with the colors. Very sophisticated yet perfect for the grandkids. I bet they love getting greetings from you! Lucky boys! TFS
Thanks so much, Linda!
So cute! I saw you said the leaf came from the Seasonal Tags and I sort of went huh? I have used those dies a zillion times for the bat, snowflakes, and cobweb and completely missed the leaf! I haven’t made one of these type of cards in ages and I have been thinking about using the snowman in this set as in the same way. I guess I will do it though it would be easier if I would break down and buy the darn layering circle framelits. Why or why have I not scooped them up? It is such a pain using the punches and hope they line up. Anyway, love the card including the coloring! I think they will like the card a lot! Where did the pumpkin’s tendrils come from?
Thanks, Chris! The tendrils came from an old pumpkin framelit set that I’ve kept. It might have been called Pick A Pumpkin – ??? Anyway, retired but still handy to have!