When thinking about the name “Petunia Pop” I couldn’t help but think of a pop-up card! Petunia Pop is one of our 5 new In Colors for the years 2024-2026. It’s a very purply pink, just a bit darker than Fresh Freesia. So I’ve made a Petunia Pop Pop-Up card. Take a look ~
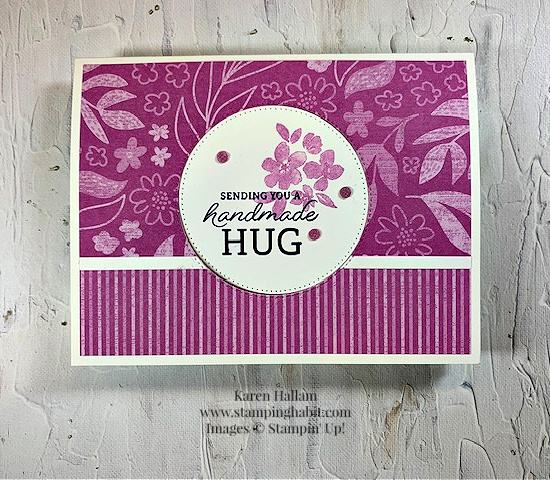
Where’s the pop? Wait for it ~
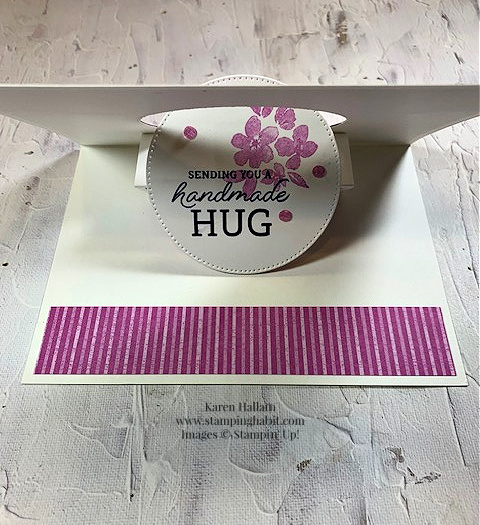
Fun, right? I got this design idea from Julie Davison. I altered it just a bit with a smaller circle, but the mechanism is the same.
To make this card, you start with a base of Thick Basic White, 8-1/2″x 5-1/2″, folded at 4-1/4″.
Glue Petunia Pop DSP to the front ~ 2-3/4″x 5-1/4″ on top and 1-1/4″ on the bottom. Tip: It’s the same sheet of DSP. Just cut and flip the bottom piece over. Another tip: Only put glue on the sides. You don’t want to glue the center where your circle will be cut out.
Glue a skinny strip of Basic White Cardstock to cover the “seam” where the two pieces of DSP meet.
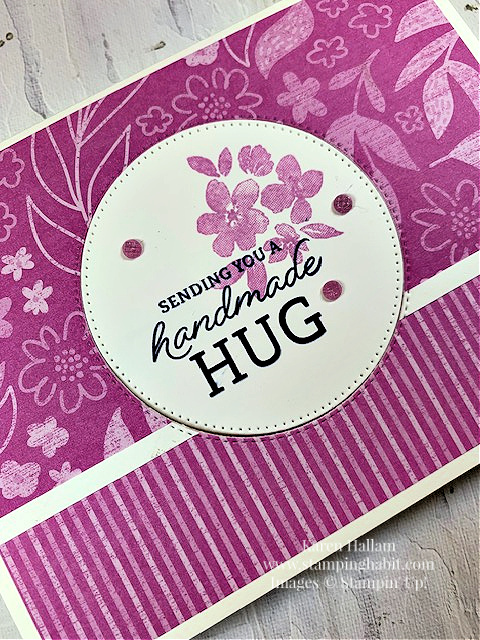
With Stylish Shapes Dies, crop a circle right out of the middle of the card front, through all layers. I used the 2nd to largest circle die, approx. 2-1/2″.
Remove the circle pieces and stamp on the white circle. I used Crafting With You, Night of Navy and Fresh Freesia ink pads. Another tip: I found that Petunia Pop stamped off once is the same color as Fresh Freesia, but it came out cleaner when I didn’t try to stamp off. Make sense? Try it and you will see.
Make the Mechanism:
Cut a piece of Basic White to 3″x 4″ and score it at 1″, 2″, and 3″. Fold and burnish. Add Tear & Tape to one open end across the 3″ side. Fold in half and place it very close to the fold in the open card base. Secure it with the Tear & Tape on the side without the hole. Next, put Tear & Tape along the 3″ open side that is facing up, then close the card. This creates a box that will hold the stamped circle.
You will also need a small piece of Basic White measuring 2-1/4″x 3/4″, scored at 1-1/4″. Glue the longer side to the top of the box. Close the card and put glue on the shorter end that is showing in the hole. Put the stamped circle back in the hole over the gluey tab to secure. Give it a minute to dry. When you open the card you get the “pop-up” feature!

I also added a strip of Petunia Pop DSP to the front side of the box, 2-3/4″x 3/4″, and one across the bottom of the inside, 5-1/4″x 1″.
Watch Julie makes hers HERE, then you can make the adaptations that I did, if you like it!
I’m featuring one of each of the new In Colors every day this week. Yesterday was Peach Pie, tomorrow will be Pretty in Pink! See you then!


Want to explore all things Petunia Pop? Click HERE to see them. When you place your order please use my Host Code! I’m sending In Color Resin Dots to each person that purchases a minimum of $75 during the month of May.

Product List
|
|
|||
|
|
|
||
|
|



Clever fun fold.
Great card! I love pop-ups but have not braved them much. thanks for sharing!
Sometimes I like to do a trial run using old cardstock or even copy paper so I don’t waste my good cardstock. Then I know I have the proportions right! Thanks, Debbie!