It’s time for CASEing Coast to Coast again! I always look forward to this monthly post with Rosanne. It’s so fun collaborating with a fellow stamper and coming up with new things to share. This month, Rosanne (East Coast in PA) chose the theme – Shaker Cards! I have always shied away from shaker cards. I’m not sure why! I have to say, I had a lot of fun meeting this challenge. Let’s first look at Rosanne’s adorable Halloween card ~

Isn’t it the cutest? You can read all the details on her card by clicking HERE. Then come back to the West Coast and see my shaker card!
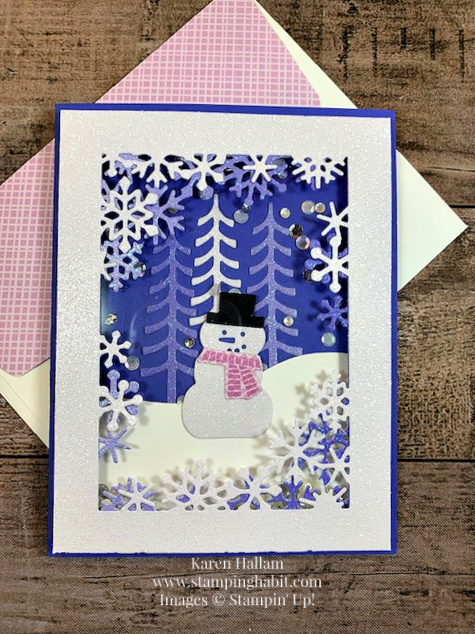
Here it is ~

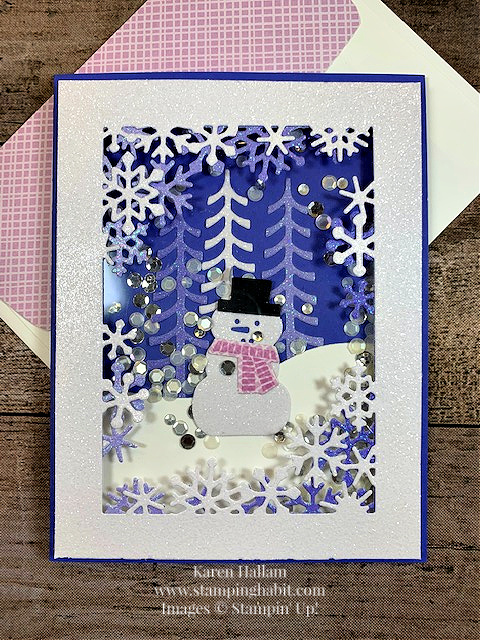
This is how it looked before I shook it. You can see that I glued down a few of the sequins to the back, so there are always a few showing whether you shake it or not. Now see it after I shook it ~

Lots of snow! This was so fun. Another shake… and here’s one more photo of the front. After that, I’ll describe the steps I took to create it.

Step By Step ~
- Cut and fold a card base at 8-1/2″x 5-1/2″. I used Orchid Oasis for my base.
- With the snowflake frame die from Snowman Dies, cut a piece 5-1/4″x 4″ from White Glimmer Paper. Cut a second one the same size from Orchid Oasis Glimmer Paper. Turn the Orchid one around 180 degrees and glue the two together, white on top. I used Tear & Tape around the perimeter to adhere them together.
- Cut a piece of Window Sheet slightly smaller than the Glimmer frames and adhere it to the back of the two snowflake frame pieces. Again, I found Tear & Tape to be a very good choice of adhesives for this. Adhere Adhesive Strips all around the perimeter of the card, leaving no gaps. Set aside.
Behind the Window ~
- Now to create the scene on the front of the card base. Cut a piece of Basic White Cardstock 4″x 2-1/2″. Cut a sloping hill from the top edge and glue it to the card front about 1/4″ from the bottom. From White Glimmer Paper crop a snowman and one tree. From Orchid Glimmer Paper, crop two trees and two small snowflakes (for the inside.) Crop the snowman’s face out using the die, then crop out a black top hat and glue it to the top of the snowman’s head with a Glue Dot. With Fresh Freesia ink, stamp the scarf to a piece of Fresh Freesia DSP from Butterfly Kisses DSP and crop it out with the matching die. You will also use this DSP to cover the back flap of the envelope and to crop out one additional snowflake for the inside.
- Glue everything into place. I had to lop off the bottom of the white tree to avoid it getting in the way of the snowman’s face! Glue down a few scattered sequins from the mix you will use for shaker material.
- Pour a little pile of shaker sequins or beads or whatever you choose into the middle of the card front.
- Wipe off the back side of the Window Sheet with your Embossing Buddy or a used dryer sheet to eliminate static.
- Remove the backing from the Adhesive Strips and press it down tightly around the scene. You should have 1/8″ border of Orchid Oasis showing around each side.

Inside ~
Stamp the sentiment with Orchid Oasis onto Basic White Cardstock 5-1/4″x 4.” Glue the three cropped snowflakes around your sentiment.
I hope you have enjoyed our Shaker Cards this month! I hope my instructions were clear and not too laborious! Taking the few extra steps make the construction a lot easier!
Until next time, happy stamping! Have fun trying new things!

Hot off the press!
It’s a Clearance Rack refresh!!! Are there any Clearance Rack addicts out there? They have just put out a whole new array of holiday-themed items and more. One of my favorite DSP packs ever ~ Ever Eden is on sale for only $6! For a peek at a card I made with it, click HERE. P.S. ~ the Gold Shimmer Vellum I used for the butterfly is also on the Rack! Save a bundle. Go check it out!
Don’t forget to use my Host Code when you shop with me! KZ9KMA64
Product List
|
|
|||
|
|
|
|
|
|
|


Karen, love this wonderful wintry shaker! That adorable snowman looks so happy to be surrounded by all that sparkle and shine. You choose a perfect bundle for our CC2C challenge. Looking forward to next month.
Thanks, Rosanne! I look forward to it, too!
I too have never tried a shaker card. Great for my very young great nieces & nephew!
Yes, great for the little ones!
Both cards are just adorable! I have never done a shaker card, but that will change! Thanks for sharing.
Thanks Karen! You definitely should try it! They are fun to make 🙂